
The Current Situation
If you’ve been following my last few blog posts you know that I’ve been developing a companion app concept for the Roscoe, NY website. At this point, all of the blueprints have been drawn, the groundwork has been laid, and the necessary testing has been done. Now, I turn this concept from an idea, and formerly a low-fidelity prototype, to a more detailed high-fidelity prototype through the use of a digital prototyping tool. Now, you may be asking, what does that even mean? Let me explain.
High-Fidelity Prototyping Tools
There is a multitude of prototyping tools that are available to use, some free, some paid, and some a mixture of both. However, these tools can provide you with a variety of benefits for you and your project. “Prototyping tools allow designers and clients to collaborate better while being in the same context rather than having conflicting perspectives… It helps teams to build understanding, to explore options and barriers that only become visible when you build and test something” (Maruti Techlabs). Being able to interact with your product, and observe others interacting with it, will give you more insight than a product that is only on paper. Being able to click buttons, use drop-down menus, and navigate through pages will enable you to focus more on the functionality of your product to see what does and doesn’t work.
Using an online prototyping tool also allows you to see your product’s UI, whereas low-fidelity prototypes do not. “A high-fidelity prototype allows you to convey design ideas with rich colors, buttons, photos, icons, animations, interactions, and more details” (“High-Fidelity & Low-Fidelity Prototyping: What, How and Why?”). Some design elements can seem like a good idea on paper, but once in practice, they can be too much or too little. Using high-fidelity prototyping tools helps you find the Goldilocks balance of your design elements.
Adobe XD: My Tool of Choice
As someone who commonly works on developing UX/UI designs, I have worked with multiple different prototyping tools: Figma, Sketch, Marvel, etc. However, my tool of choice is Adobe XD. The Adobe Creative Suite has always been my go-to, although I do understand it can come with a hefty price tag, and there are cheaper and even free alternatives. But, XD is what works best for me, and typically my project scopes as well. Author, Matt Rae explains, “Adobe XD is a powerful and easy-to-use vector-based experience design platform that gives teams the tools they need to craft the world’s best experiences collaboratively.” The prototyping abilities of Adobe XD are seemingly endless, and they create some of the most realistic looking and performing high-fidelity prototypes.

I am also a fan of the collaborative opportunities that Adobe XD provides. The tool provides the ability to quickly generate a link that can be sent to and used by an audience of your choice. This link can be used to interact with the prototype as if it were a real, functioning product. These links can even be altered to best fit the audience you are sharing them with. The options include Design Review, Development, Presentation, User Testing, and a custom share type. “With the ability to share links to designs and specifications, team members can quickly view and leave feedback easily via comments directly in the browser” (Rae). The opportunity for users to leave feedback directly within the link on their browser can also provide you and your team with feedback that you can return back to.

Know Roscoe: Hi-Fi Edition
As I mentioned earlier, I have been developing a companion app for the Roscoe, NY website. This week, I turned my low-fi prototype into a hi-fi prototype using Adobe XD. I was finally able to utilize a full-color palette as well as different typefaces to more fully represent the UI. I chose to use different shades and gradients of green because, in color theory, the color green typically represents nature, environment, safety, harmony, and relaxation. All of which are accurate representations of what Roscoe, NY is all about.
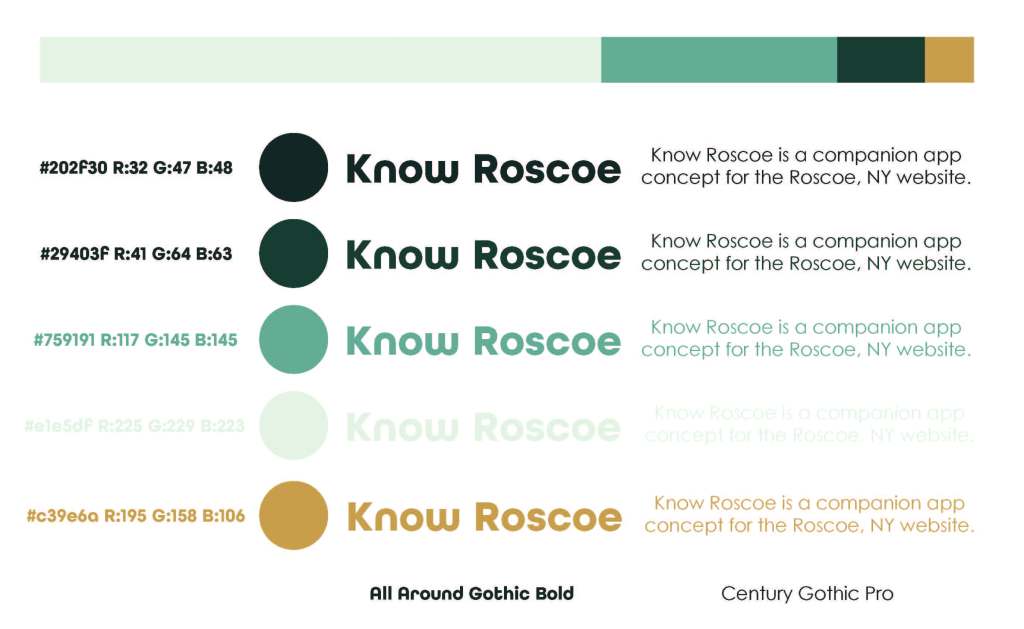
I chose the typefaces All Round Gothic and Century Gothic Pro because I knew there would be a lot of text within this app. I used All Round Gothic for page headers to add a bit more creativity to the design while using Century Gothic Pro for body text and titles for easier readability.
I developed the entire UI within Adobe XD and prototyped accordingly after the design was complete. Adobe XD provides for a simple and easy prototyping experience, by clicking on elements and then dragging an arrow to your desired destination page or element. It also provides the ability to simply prototype littler things like “scroll to top” or “return to previous artboard.” If you want to interact with the high-fidelity prototype for Know Roscoe, check that out here.

I also recorded a walk-through of the app with commentary explaining the significance of each page and the content within it. You can watch that video here!
Looking Forward
As far as the next steps go, it may seem as though this project is complete and simply needs to be coded and worked on by developers. However, there should still be a few more rounds of usability testing conducted to ensure that this app provides the most optimal user experience, the design elements work well with the content and are not too distracting, and that information can be quickly located by users to help them complete their desired tasks. One of the great things about Adobe XD is that this testing can be conducted with the program and does not require any additional time or external programs! If you are able, I would definitely recommend Adobe XD to anyone in the market for a higher-end prototyping tool.

Leave a comment